 |
|
|||||
|
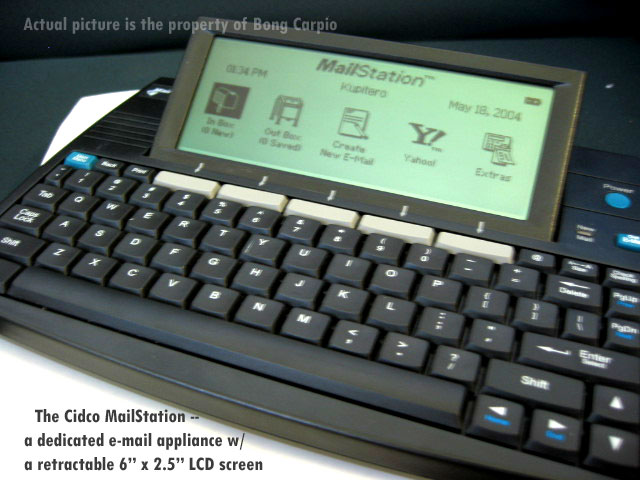
On to Kupitero's obsolete computers/gadgets...(please note that these are all actual pictures)! Cidco MailStation 100:
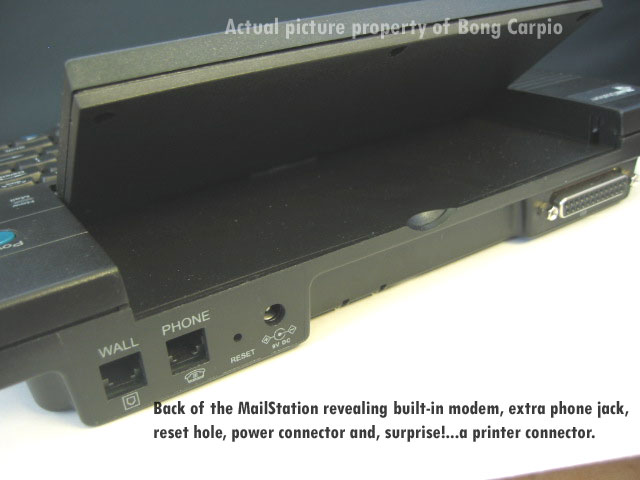
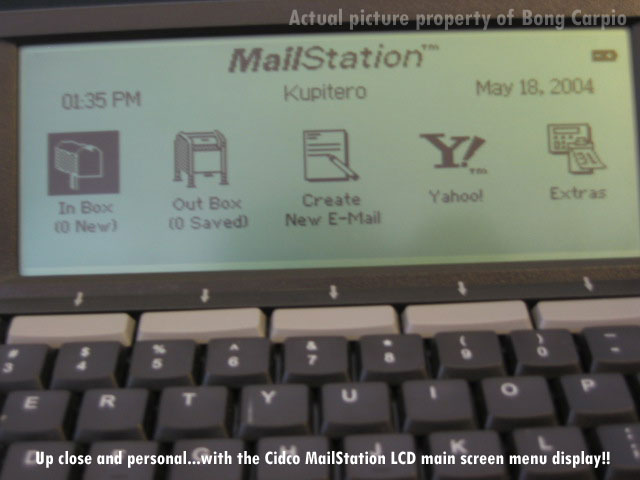
Designed for people who have no time to use a PC but wants to have access to e-mail -and quickly -, the Cidco MailStation was a device of many names. It was marketed by SBC in 1999 as the eMessage, the Home-m@il by Telefonica (Spain) the MailBug and finally, the MiVo by Earthlink. The handy, 2.2 lb device has a tilting, 6" x 2.5" LCD screen, a built-in 33.6 modem, a printer port and can be powered by three (3) AA batteries or via the bundled AC adapter. If not accessing your e-mail, the unit also has PIM (Personal Information manager) functions: a calculator, calendar, address book as well as a spelling checker. These are inside the "Extras" icon in this screen shot. The keyboard has a nice feel despite its size and the five(5) gray-colored, function keys are very, very useful shortcuts to access most of the notable features of the device. You can even use it as a very simple word processor in lieu of a notebook and simply send the document via e-mail or output it to a printer!!! As of this writing, this device still marketed by Earthlink (an ISP in the U.S) as the MiVO. But, again, with the proper hack, the unit can be used on any available ISP.
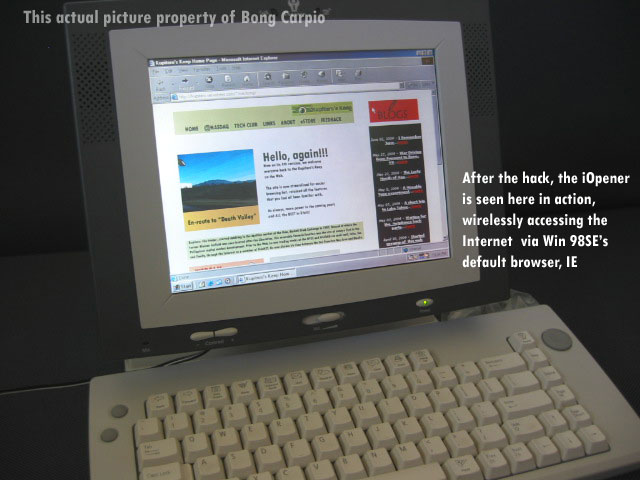
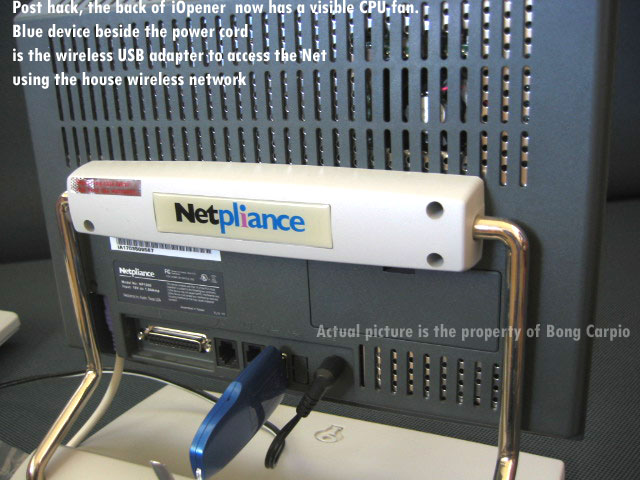
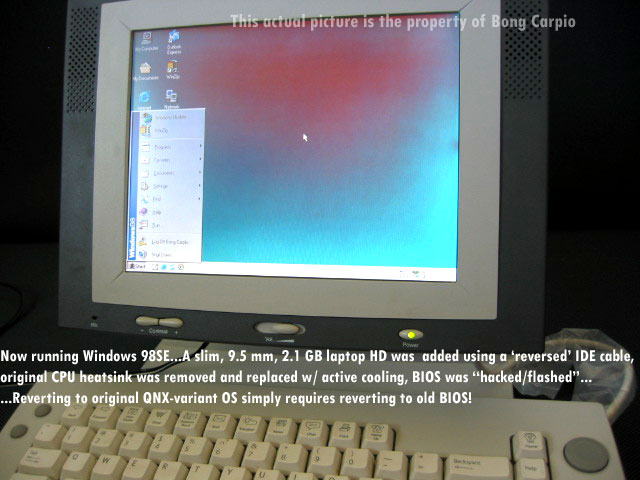
The "hacked" Netpliance iOpener: After a month of off-on-off work in this device - this included waiting for the delivery of other essential parts - the transformation was completed on 6/02/2004. (View original (stock) version). Here are the specs of this "new" machine: Rise (VIA/Cyrix) 266 mhz CPU (before: a 200 mhz IDC Winchip); 64 MB of RAM (before: 32MB RAM); 2.1 GB hard drive (9.5" mm IBM TravelStar) (before: none); an 11 mm. active cooling CPU fan with heatsink clipped-on the CPU socket (before: a massive 4" x 7" x 10 mm passive cooling heatsink only); new keyboard-accessible and configurable Award BIOS (before: Award BIOS but was not accessible by keyboard); wireless Internet access -using any ISP- via a USB wireless adapter (before: dial-up Internet access only via built-in 56K modem using Netpliance-provided ISP only). Other notes: To install the active CPU cooling, the RF shielding was slightly cut open to minimize the noise coming out of the CPU fan as well as to blow out any CPU heat-buildup more efficiently. The 3.5", 9.5 mm laptop hard drive was installed using a piece of aluminum sheet that used to be a top cover of a non-working, standard PC floppy drive. This was cut to size and drilled to mount the laptop hard drive from the base and was attached in a space that was occupied before by the massive heatsink (which was replaced with active cooling). You can install any flavor of Windows (XP, ME, 9x, 3.1, 3,0, NT, etc), DOS or Linux as long as the CPU and memory requirements for the choice OS are installed. Windows 98SE was chosen for this reason as well as the availability of drivers for the device. All built-in features like sound, modem are functional under Win98SE. Simply adding more memory (standard 44-pin SODIMM), will enable the system to operate faster and more efficiently. The device is now in the kitchen to access online recipes, news, etc... as well as for other PC use...all in a sleek, compact (6" x 11" tilting base) case and a 10" LCD screen!!! |back to Main Gadgets||previous||next| All trademarks and brands mentioned here are the registered trademarks of their respective owners. |HOME| |LINKS| |FEEDBACK| |@NASDAQ| |TECH CLUB| |SHOP!| |BLOGS|
� Copyright 1994-2016, Kupitero's Keep� All rights reserved |
|
|||||